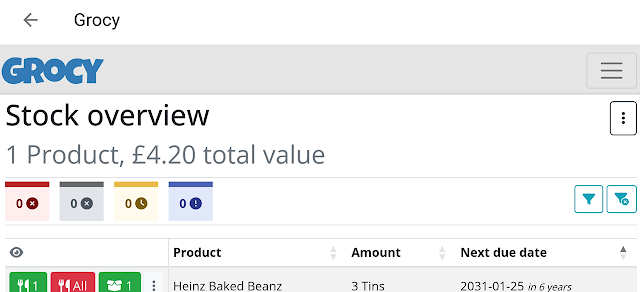
Now we have Grocy working, even if in skeletal form, the next hurdle is to cut the tie to the PC and go mobile. The advantages of being able to update stock levels on the hoof are obvious. All consume and purchase operations can be done at the point of use without the need to make notes and mark these up later. Inventorying can be performed at the storage location rather than dragging everything to the computer or more note making.
What is needed, therefore, is mobile access to Grocy via a smartphone or tablet. There are multiple ways to achieve this.
Web Browser
The first and simplest method is to use the web browser on your device. Although, at least with Android devices, the browser is slightly finnicky about which address it will accept for the Home Assistant (HA) server. Using the standard homeassistant.local:8123 address results in an error message 'This site can't be reached DNS_PROBE_FINISHED_NXDOMAIN.'
There appear to be known problems with Android phones (see 1/2/3). Unfortunately the HA Community pages are a bit light on details of the actual cause and how to fix it. Happily though the way round it, for me at least, was not complex.
Although the text URL didn't work, entering the IP address (circled) with the port number did the trick (drop the /24 suffix though - it's a definition term for the IP number and doesn't form part of the address). So in the case above, typing 192.168.0.97:8123 into the browser address bar got me to the HA log-on screen.
Enter your login details and you are into a mobile version of your HA homepage. From here go the menu (circled) and follow the familiar Settings > Add-ons > Grocy route to get to the Grocy HA interface.
Scroll down to Open Web UI to get into Grocy.
You'll have to log on again, but after that the whole interface is available via the browser. It's that easy.
Home Assistant App
If you'd prefer, Home Assistant have mobile apps for Android and iOS devices. The Android one is available in the Play Store.
Once installed it opens onto a screen that allows you to select your local HA server and then you are ready to log in.
I left phone tracking off as I don’t need it for Grocy and we are back into the familiar HA interface again.
Navigate to Grocy, log-on and once again you are in the Grocy interface, just not in dark mode this time.
Grocy App
The last way to accomplish the same task is to use the Grocy mobile app, which is available for Android or iOS and is produced by Patrick Zedler.
Once started the Welcome to Grocy Android! screen tells us that we will need either a stand-alone server running Grocy or one hosted on Home Assistant. All good, we have the latter so can select the Own server button.
Choose Allow on the pictures permissions request in order that the app can read the QR codes that it will ask for next and ... at this point the set-up procedure fell over for me. Partly because I didn't follow the instructions closely enough and partly because the automated set up procedure is not that robust. However, after a few attempts, I managed to stumble through it.
So not in the order that I did it, here is how to prep for automated server sign-in on the Grocy app.
Basically you need to set up API keys in Grocy and in HA before opening the Grocy app and attempting to log on to your Grocy/HA server.
Grocy API key
On another device (ie back on the PC) go to Grocy on HA and choose Manage API keys from the Settings menu.
The API keys page will open; select Add (circled).
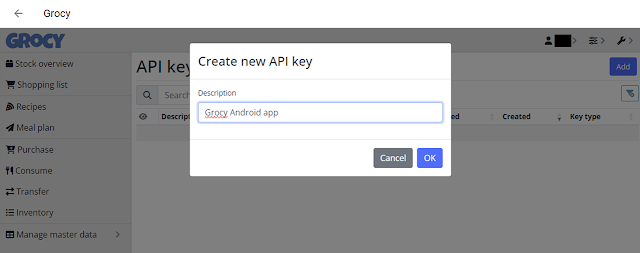
In the Create new API key dialogue box type a name for the new key and press OK.
Grocy will now generate an API key; a 50 character string of text. Clicking the QR code icon (circled) brings up the API key QR code. If you are logged into Grocy you can access the QR code whenever you wish.
Now that is complete you must set up a Long-lived access token in Home Assistant.
HA Long-Lived Access Token
To get to this part of HA you need to click on [Initials] [Your ID] in the bottom left hand corner (circled), which brings up your Profile on the General tab.
What we want is located at the bottom of the Security tab, Long-Lived Access Tokens.
If we select Create Token a dialogue to create a new token will open asking you to name the token.
On clicking OK HA will generate a 183-character access token, this is a one-shot affair and once you complete the process you won't be able to access it again from the HA interface. So best to copy it and keep it for future reference.
Generate QR Code will pop up the required code that the Grocy Android app will ask us for. Don't close this box. Leave it open and return to the app (for ease you can have the Grocy API key QR code open in another HA tab).
Grocy App set-up
With the two QR codes that the Grocy app will ask for generated we can now go back to the app.
Initially it will ask for the Grocy API key, look at it and detect that you are using Grocy as an Add-on with HA. Now you can point it at the HA Long-Lived Access Token QR code and, after a bit more staring, it should prefill the fields on the manual login page. Those being Server URL and Long-lived access token for HA and Ingress proxy identifier and Valid API key for Grocy. I have no idea where the data in the Ingress proxy identifier field comes from but it is another text string, 43-characters this time.
Clicking Login will probably lead to it falling over but this appears to be due to the same reason that the text HA address couldn't be used in the Android web browser above. Replacing the Server URL (ie homeassistant.local:8123) with the HA server's IP address should correct this (ie 192.168.0.97:8123 in this case).
We now have Grocy installed and useable at the point of contact via whichever of the above routes you chose. One final feature has to be set up in order to meet the initial requirements for the program I outlined at the beginning of this series. The ability to use barcode scanning to track the use of products.
P.S. You might get a pop-up notice describing different barcode scanning options whilst you are setting up the Grocy app. You can access this feature later once everything is working so I chose Ignore.


Comments
Post a Comment