
The last leg - Installing Grocy

Hopefully this is the final installation step of my matryoshka virtual bean counter, ie Grocy running on Home Assistant (HA) running on a virtual machine running on my PC.

Home Assistant is explicitly designed to be interoperable with and extensible to as wide a range of devices, protocols and programs as possible and uses integrations to link in specific home automation devices and services. However for third-party programs that deliver more extensive functionalities the term Add-on is used and Grocy is an example of such an Add-on. 

So our first step is to navigate to the Add-ons screen (Settings > Add-ons). If you are using a clean install there will be nothing on this page.

From here we follow the link to the Add-on Store (bottom right-hand corner above). Don't try to use the search bar (Search add-ons) at this point as it won't work, it only looks at your installed Add-ons.

Once you are in the Add-on Store using the Search bar will return the link for Grocy if you use it. Alternatively you can just scroll down to it (it's in the Home Assistant Community Add-ons section).

Following this link brings you to the Grocy project description, which has more information on the project including a link to its webpage and some community resources. The next step is to hit the Install link (circled in red).

By default Grocy sets itself to load on boot of HA.

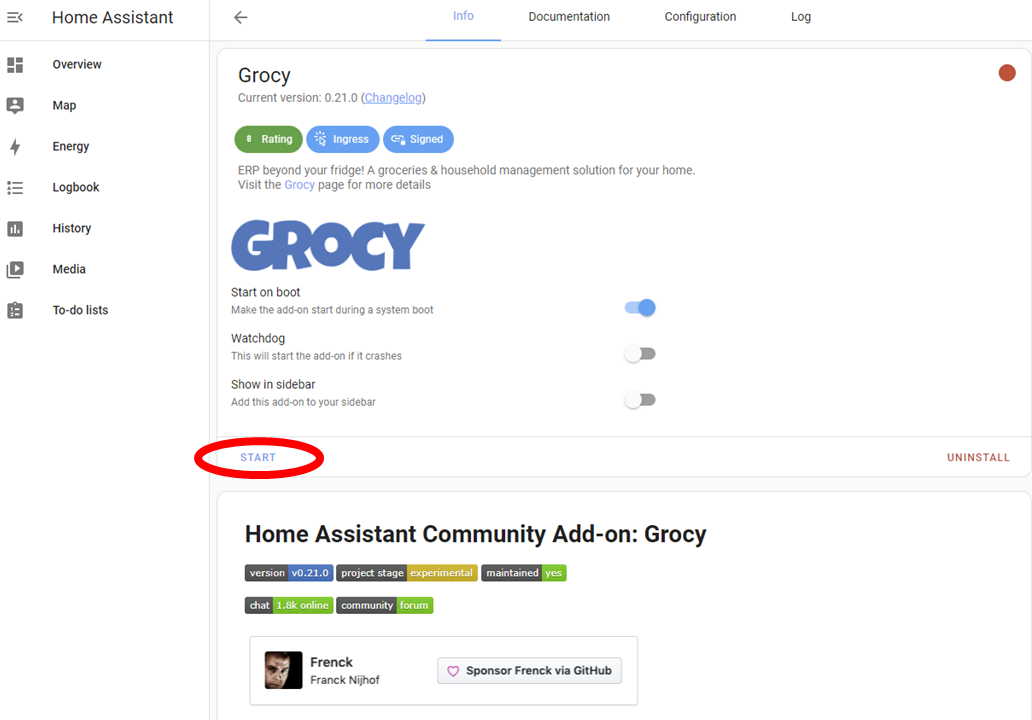
Clicking Start (circled) will start the service on HA.

Selecting Open Web UI (circled) will bring up a Login page. The installation instructions with the defaults are in the Documentation tab above (also circled); the initial Username and Password are both admin.

And that's it. Obviously the last thing to do before beginning to use Grocy is to change out the default log-on details.

After clicking on the main menu icon (three horizontal bars in the top right corner), selecting the admin user will drop down a menu with Change password as an option and clicking this will bring up the Edit user dialog where you can alter the Username and Password for the default admin account.

Once you hit Save the defaults will be overwritten.

To log out click on your new username and a drop-down will give a Logout option.

However as Grocy will boot along with HA it isn't really necessary to do this.

Finally everything is in place to use the program. From here there a few small admin tasks to do then we can get started with seeing if Grocy is actually going to meet my requirements.

Comments

Popular posts from this blog

Getting moving with Grocy

Now we have Grocy working , even if in skeletal form, the next hurdle is to cut the tie to the PC and go mobile. The advantages of being able to update stock levels on the hoof are obvious. All consume and purchase operations can be done at the point of use without the need to make notes and mark these up later. Inventorying can be performed at the storage location rather than dragging everything to the computer or more note making. What is needed, therefore, is mobile access to Grocy via a smartphone or tablet. There are multiple ways to achieve this. Web Browser The first and simplest method is to use the web browser on your device. Although, at least with Android devices, the browser is slightly finnicky about which address it will accept for the Home Assistant (HA) server. Using the standard homeassistant.local:8123 address results in an error message ' This site can't be reached DNS_PROBE_FINISHED_NXDOMAIN. ' There appear to be known problems with Android phones ...

How-to: Setting up a Blogger account with a non-Google e-mail address

As I've set up an e-mail address for the blog it makes sense to be able to post from it too. To do that I will need to set up an account with Blogger for the new e-mail address. At the same time I'll create a gmail account to both manage the blog and give access to the Google apps suite without the monthly fee. Skullcinema@gmail.com is already taken (as there is nothing new under the sun), but I can take a related e-mail address. I won't publish it here as the first address will generate enough spam as it is. Setting up a gmail account really doesn't require a guide, but it is covered here if you need one. So, off to set up an account  through Blogger . First of all though, log out of Google and/or Chrome or it will pull you straight through to Blogger on the account you are logged in on. Choose SIGN IN in the top right-hand corner of the Blogger home page, and then select  Use another account underneath the list of your current Google accounts. Now ...

Getting to grips with Grocy

After only a few hiccoughs along the way we are entering the final stage of the Grocy set-up procedure. Getting barcode scanning working should markedly streamline the process of dealing with products. As this was a test of the Grocy system it was definite that I was going to use the camera on my phone as a barcode scanner. But there are options around this choice if everything works as required and the system progresses into an installation phase. Although use of a phone camera is by far the simplest method of capturing barcodes, it is not the one suggested by Grocy's creator, Bernd Bestel . He recommends the use of a dedicated barcode scanner. These days they are not that expensive and a basic wired model can be found for as low as £12. Not that I think that this is a good idea unless you want to lose the mobility that we have just set up . For twice the price (still not that much if you are using Grocy routinely) you can get a wireless version, which should retain your freedo...