
Configuring Grocy

Once Grocy was installed there were two pieces of housekeeping to do to it before it could help with the housekeeping. The first was to localise it and the second to drop out unwanted features of the program to create a more streamlined interface.

All of the information on how to complete this is on the Documentation tab (red circle) and the alterations are made on the Configuration tab (green circle).

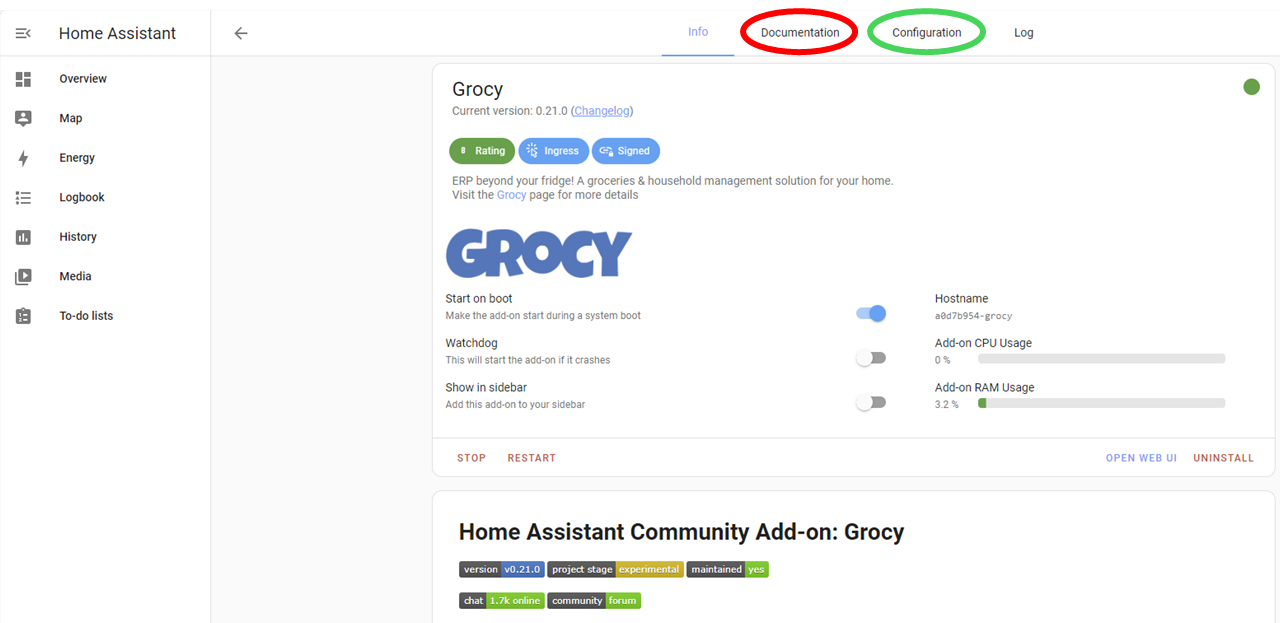
The instructions in the Configuration section of the Documentation tab look a little daunting at first. But there is no need to tackle all of them in the first instance and, from my reading, there didn't seem to be any reason why the settings can't be altered at a later date if need be.

To localise Grocy only the culture and currency options on the Configuration page need to be altered. The program defaults are for USD and US English (en).

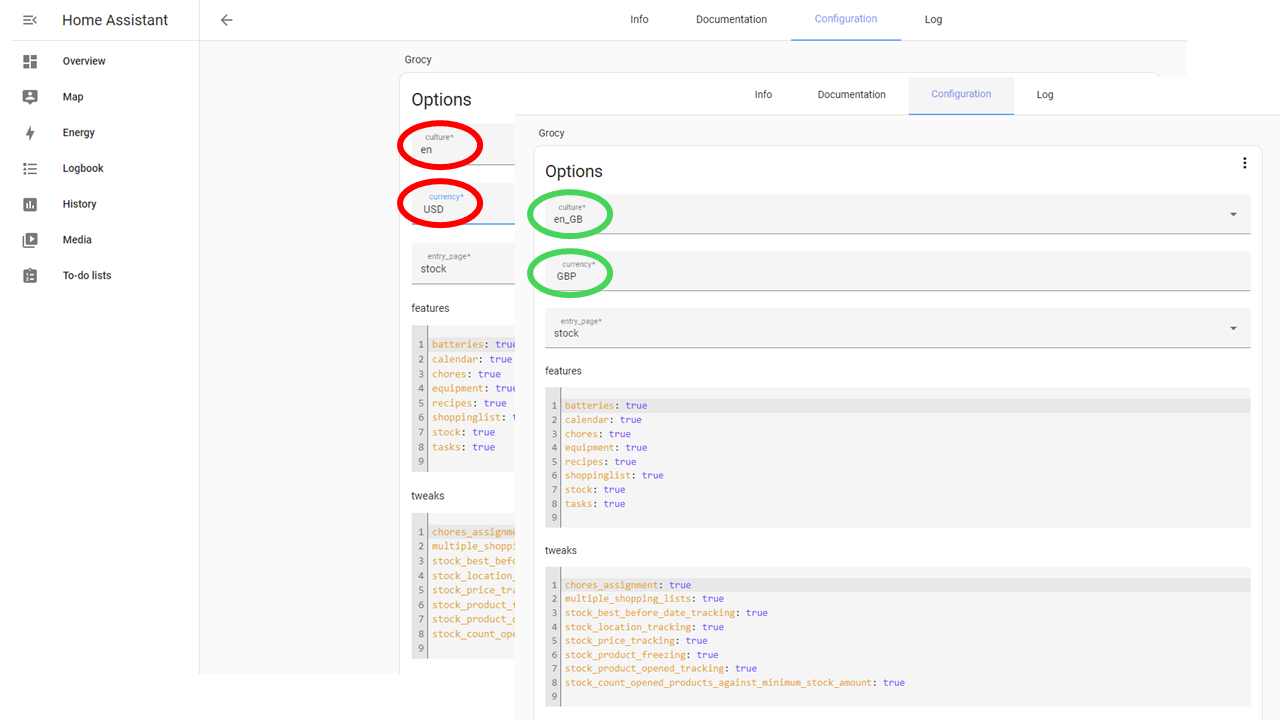
To get proper money and the King's English it was just a matter of typing in the 3-letter currency code GBP and choosing en_GB from the culture drop down (this must be a bit galling for the Irish but obviously anything else would be too taxing for our American cousins). Don't forget to click Save and then Restart at the bottom of the Options list.

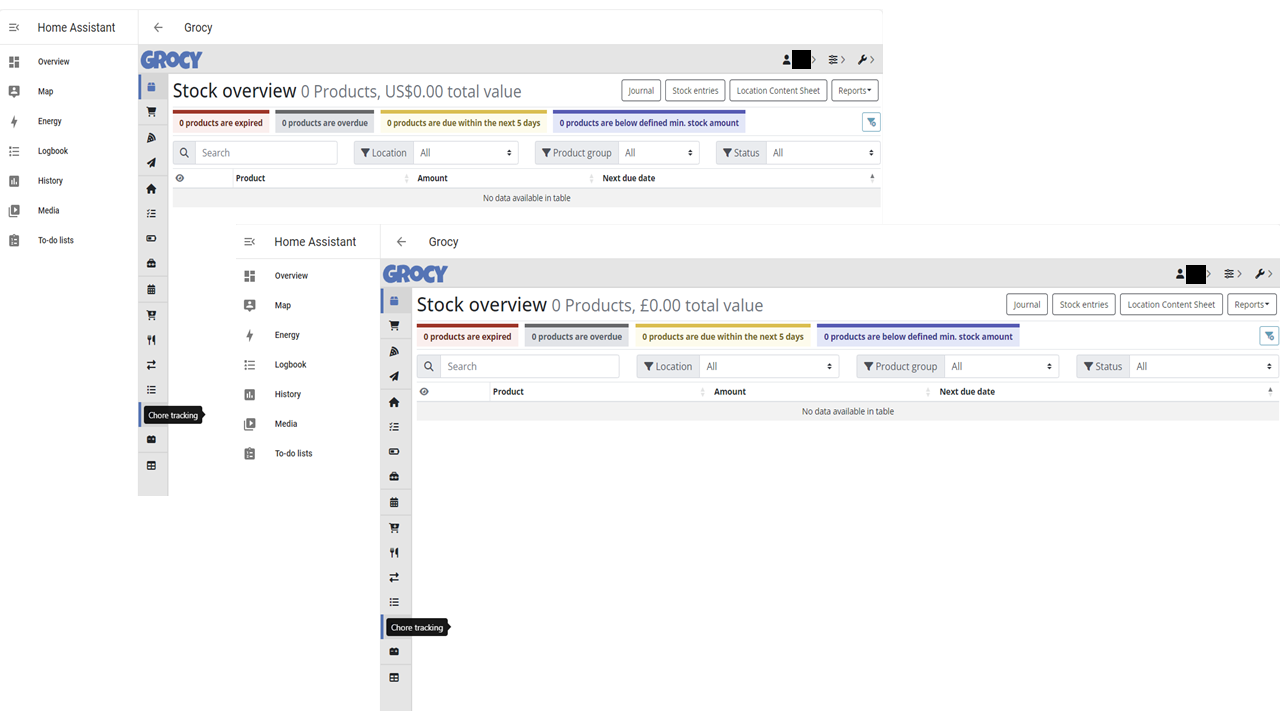
Now we have pounds sterling but for some reason still chores (a US term for housework). But close enough.

The next step was to drop out the features of Grocy that I won't use, at least in the foreseeable future. I could explain why at this point, but as I'm not going to use them what is the point? The no-thanks list for me is batteries, calendar, chores, equipment and tasks, or more than half the features. Of the remaining three, recipes may also be deleted at a later date if I decide it's not needed.

Hopefully, reducing the number of menu options from 16 to 9 will markedly reduce the time it takes for other users to get to grips with program (and everyone's stress levels).

Now I can get started with the program.

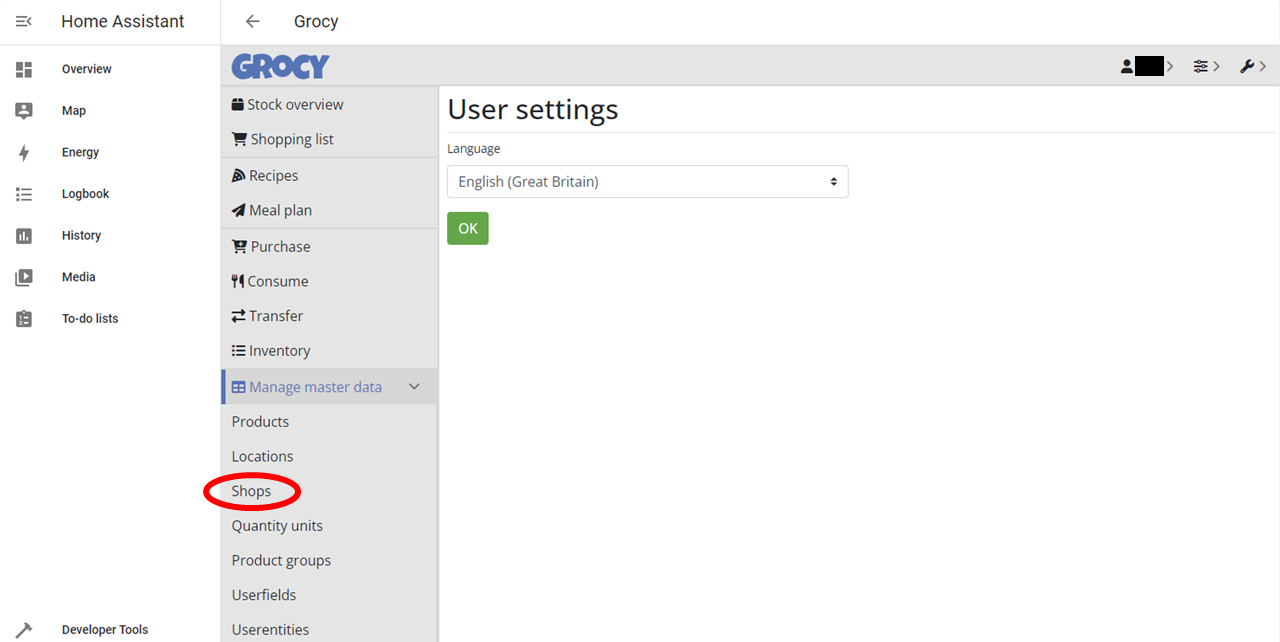
P.S. About half way through my first attempt to use Grocy I stumbled across another level of configuration. Under [username] > User settings.

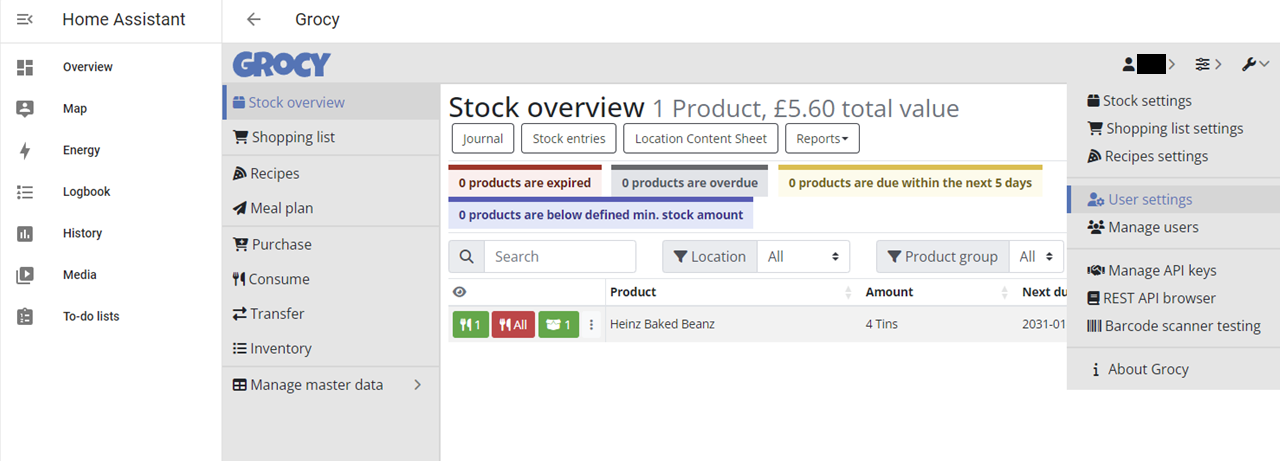
For some reason Language is set as Default despite being the whole program being configured for GB English. Setting this to English (Great Britain) and clicking OK gave an unexpected result.

But the change did stick on rebooting Grocy and now Stores was Shops. ✅

Chores is still there though.

Comments

Popular posts from this blog

How-to: Setting up a Blogger account with a non-Google e-mail address

As I've set up an e-mail address for the blog it makes sense to be able to post from it too. To do that I will need to set up an account with Blogger for the new e-mail address. At the same time I'll create a gmail account to both manage the blog and give access to the Google apps suite without the monthly fee. Skullcinema@gmail.com is already taken (as there is nothing new under the sun), but I can take a related e-mail address. I won't publish it here as the first address will generate enough spam as it is. Setting up a gmail account really doesn't require a guide, but it is covered here if you need one. So, off to set up an account  through Blogger . First of all though, log out of Google and/or Chrome or it will pull you straight through to Blogger on the account you are logged in on. Choose SIGN IN in the top right-hand corner of the Blogger home page, and then select  Use another account underneath the list of your current Google accounts. Now ...

Getting moving with Grocy

Now we have Grocy working , even if in skeletal form, the next hurdle is to cut the tie to the PC and go mobile. The advantages of being able to update stock levels on the hoof are obvious. All consume and purchase operations can be done at the point of use without the need to make notes and mark these up later. Inventorying can be performed at the storage location rather than dragging everything to the computer or more note making. What is needed, therefore, is mobile access to Grocy via a smartphone or tablet. There are multiple ways to achieve this. Web Browser The first and simplest method is to use the web browser on your device. Although, at least with Android devices, the browser is slightly finnicky about which address it will accept for the Home Assistant (HA) server. Using the standard homeassistant.local:8123 address results in an error message ' This site can't be reached DNS_PROBE_FINISHED_NXDOMAIN. ' There appear to be known problems with Android phones ...

HMRC a-no-go

A few years ago I set up a new company in the UK. The government here has invested quite heavily in digital services so this can be almost entirely completed on-line. You begin the process by notifying Companies House , the venerable UK registrar for companies (for 180 years this year), that you have set up a company. In order for you to do that on-line the Government needs to have some sort of user registration system and one that is a bit more secure than your regular website. Enter the Government Gateway , a government-wide ID system launched in 2001. It was initially designed to be a one-stop-shop that would provide a log-on solution for all of the UK government's on-line services. Whether you were a business/organisation or an individual citizen, with security credentials backed up by GCHQ no less. The Companies House process was exceptionally straightforward and a Government Gateway ID (GG ID) was set up by Companies House for the business. No problems. Another early task...